Little Lottie: September 2014

Sunday 28 September 2014

DIY: Holiday Outfit


Hello you! Something a bit different today, a DIY post! I know it's a bit late in the year to be doing a 'holiday outfit' however I'm off to Makadi Bay in November and am in need of something summery as obviously the shops aren't equipped for that in Autumn. 

The lovely people at endlessleather offered some inspiration and here are the creations my mind concocted. 

I obviously chose a piece in my favourite colour and this leather cuff bracelet was super easy to make and bang on trend. 

You will need;
A leather cord of your choice
Super glue
A fastening 


I chose this toggle clasp from endlessleather's selection. 

The first step is to cut a piece of leather to your wrist size, remember to leave a space for your fastening and decide how tight or loose you want it. I slotted the leather into the fastening to ensure the bracelet wouldn't fall off once secured as my chosen clasp was quite long I didn't need much leather. 


Once you've decided the length cut the leather using sharp scissors. (preferably fabric scissors) Be careful as they are super sharp! 


Double check your length again then secure by popping a drop or two of super glue into your clasp.

Next push your leather or cord into the clasp and hold for a few seconds to set, repeat on the other side. I glued my cord at opposite ends of the clasp (one to the left and one to the right) to create the crossover you will see at the end. 

Notice that I glued the cord to opposite ends of the clasp

You should result with something like this, as you can see the pink cord is set in the clasp nicely. The bracelet does look lovely already and you can stop here if you wish.

Next I repeated this by cutting another piece of leather the same length and securing with glue but this time crossing over the first piece and gluing in the gaps of the clasp. 
Perfect fit!


You should result with something like this, if you wanted two straight bands that also looks lovely but I crossed mine over for something different. There is something very ballerina like about this lovely bracelet.


Display as you wish when you aren't showing off your DIY bracelet. Mine takes pride of place on this jewellery dish from Urban Outfitters. 


For my next creation I made a toga dress, they always look very Grecian and elegant which is a look I want whilst abroad. I was shocked at how easy this was to make, so if you've got some old clothes lying around think twice before you write them off completely!

To make the toga I used a pair of old leggings and a skirt. Alternatively you can start from scratch with material. 

Begin by creating the bottom of your toga, I simply tried on the old skirt and cut to a length that I wanted. Use some sharp fabric scissors and leave a few centimetres extra to hem after cutting so the fabric doesn't fray.


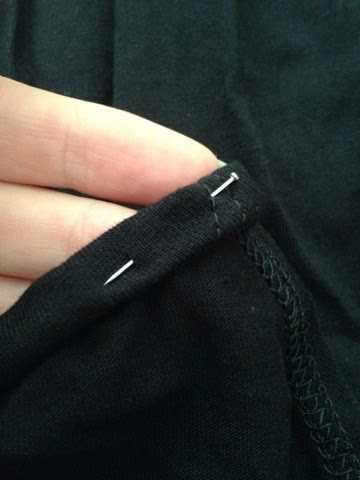
After choosing the length take some pins and fold around 2cm of the bottom of the skirt into the inside to create the hem. (refer to pictures, this was difficult to explain) 

Repeat this all the way around the skirt in a straight line like below. 
Once pinned get ready to sew, I used a zig zag stitch to ensure the material didn't fray in the future.

I'm pretty sure I have the cutest sewing machine 

Remember to take the pins out as you go so you don't damage your machine! 

Once the skirt is completely hemmed try on again to check the length and size. 

Next use two pieces of long material or the legs from the leggings if you are like me! 


These will be the cross over top of the toga dress, sort of like dungaree straps holding up the bottom (who knew leggings could become a dress so easily!) 

Pin the bottom of the material to the inside of the skirt elastic and fold over your shoulder to ensure there is enough fabric to reach the back part of the skirt. 
Like so...


Then sew in place!

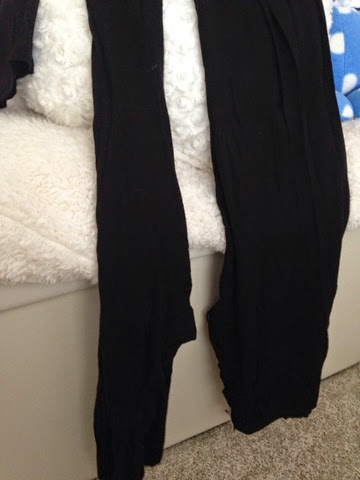
You should now have something that looks like this. (secured on the front but not the back yet)
Now fold the excess material over your shoulder and tuck into the back of the skirt to make the strap! Pin into place making sure the size is right for you so that the strap doesn't keep falling off your shoulder. 

Excuse the washed out photos, the black material didn't get along with my camera 
Sew into place and voila! One side is finished.

Repeat this on the other side with your second piece of material, or legging leg.

You should now have a gorgeous toga dress! I'm really pleased with mine but we aren't done yet! 


For some finishing touches I added some leather cords from endlessleather.

First of all using this beautiful plaited flat leather as a belt, I twisted it to carry through the toga theme.


Next I ruched the shoulders by scrunching and stitching in place.

To finish off I added some lovely round turquoise suede from endlessleather for a pop of colour and a Grecian feel, it also covers the stitches nicely. 


I hope you liked this post and are happy with your results if you gave it a go yourself. Thank you to endlessleather for their generosity and inspiration.

Be inspired at www.endlessleather.com!

Done forget to comment and subscribe for more Little Lottie! xo 

Tuesday 16 September 2014

A Long Weekend Away

The Severn bridge at sunset

Driving to the wedding

Recently I had a long weekend away and some time off work to recuperate, we went to Wales which is 5 hours from where I live. I drove the entire way, singing along to Ariana Grande and Radio 1, I think Nick (my fiancé) got quite fed up. It was a rainy weekend but that didn't ruin the gorgeous country views on the way. On Friday night after the drive we stayed at Premier Inn (living it up, as usual) near Cardiff. I would have loved to explore the big cities but in the morning we had another 3 hour drive to complete to get to my lovely friend's wedding.
Premier Inn = Sleep time

I think we hit about every obstacle possible on the way to the wedding. After 3 tractors, 1 road closure, 1 motorbike race event and a tourist road train ...(yes, a train full of tourists driving on the road) I was getting rather stressed but we made it 10 minutes early to the wedding and sprinted to the gorgeous marquee to grab a seat on the decorated hay bales. The wedding was pretty and quirky like my good friend, the bride.
Our gorgeous wedding favors and decorated bales (lala is my nickname)


The beautiful marquee

Quirky cake

The wedding venue seemed like it was in the middle of nowhere but had scenic views across Wales and was high up a hill in Llanidloes, (the Sat Nav was key here.) After dancing the night away and drinking champagne by the campfire until midnight we slept in our tents and woke up to a bacon sandwich made by the bridesmaids. As I'm engaged myself I couldn't help but think about how lovely this small wedding was and what dress I would choose for my big day.

The views on the way to Newtown

The severn bridge - Homebound

I was eager to stop off at Bristol for some shopping on the way home so after dragging a hungover Nick into the car we set off to find the Cabot Circus Mall. When we arrived at the car park we immediately made our way to H&M and Primark, these are very big high street stores that I'm a fan of. We decided to stay in Bristol for tea before the remaining 3 hour journey home and after trawling round the food court trying to decide on dinner we ended up in Frankie and Benny's (an American themed Italian restaurant.) I went for the Pulled Pork 10" pizza and ate every slice whilst Nick had a pulled pork burger, afterwards we well and truly felt like pigs.
Yummmmyyy

Nick fell asleep the rest of the way home, we arrived just before 9pm and had a much needed sleep.

I rarely venture out on long trips in the car but it was very fun and felt like an adventure to just aimlessly drive with a Sat Nav into the abyss of the countryside.

I hope you enjoyed this post, it's slightly different to my usual but expect more as I've booked a holiday to Makadi Bay!